Instructions
-
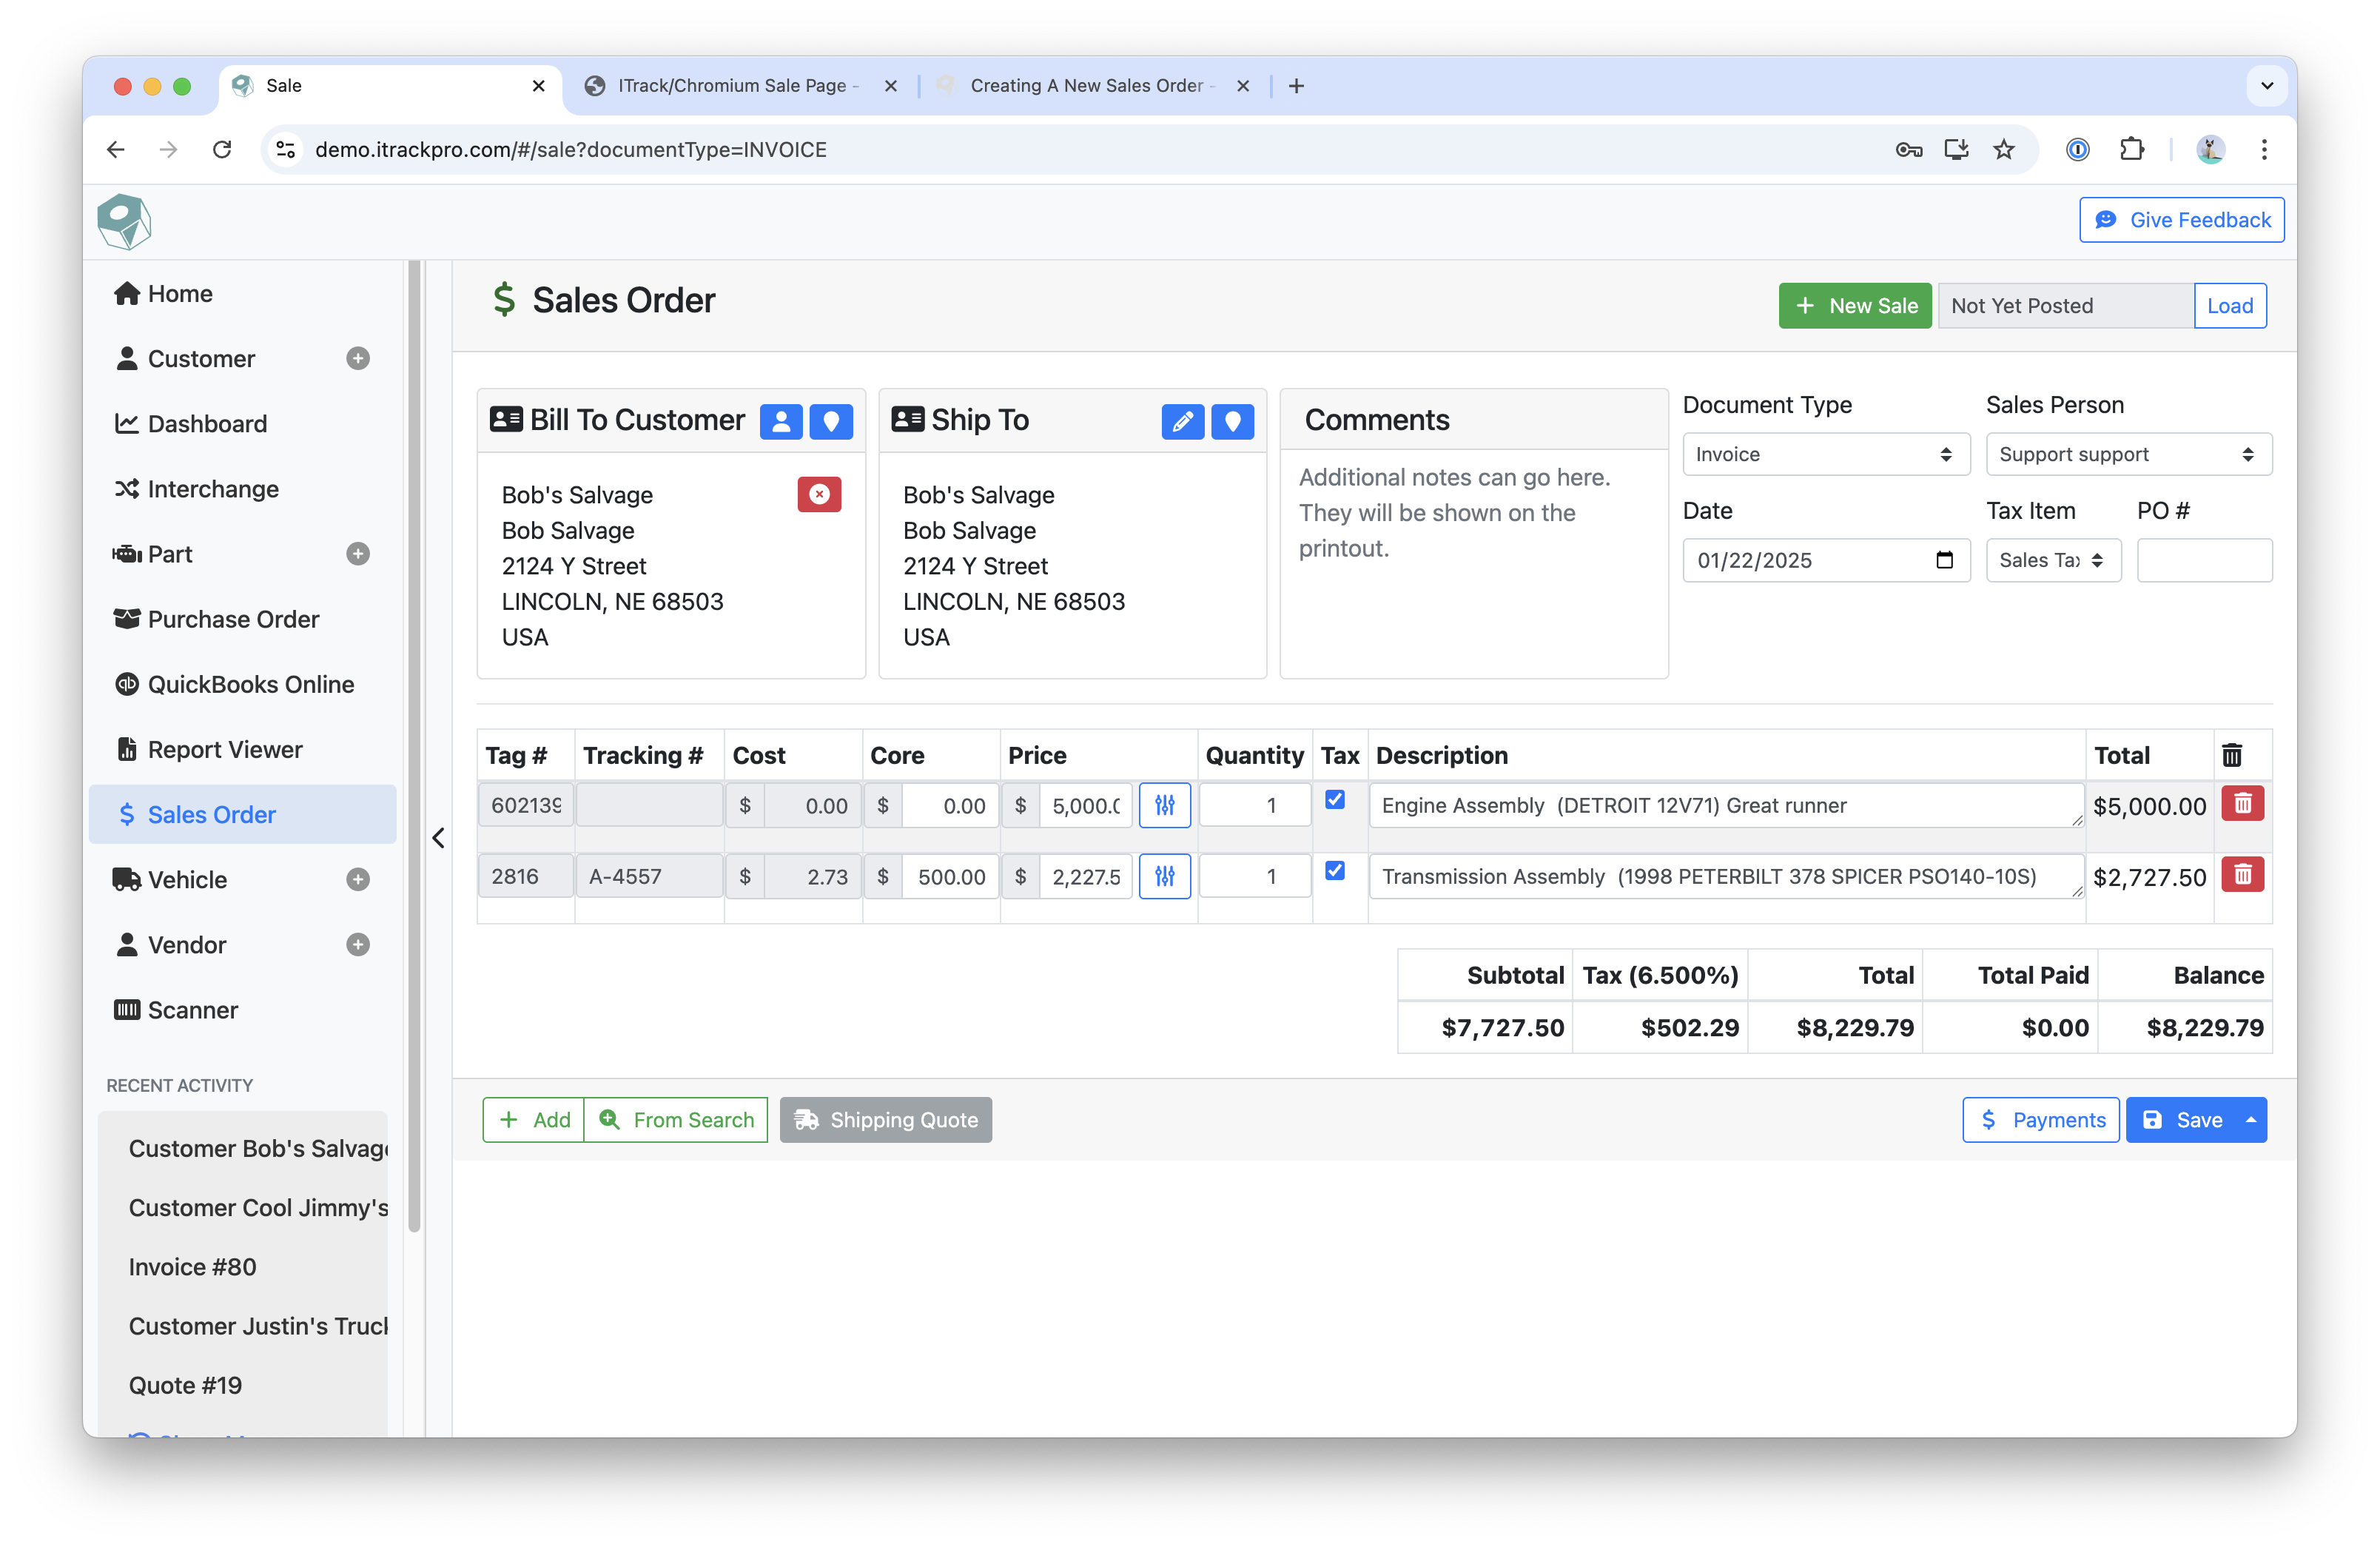
Click the New Sale button on the Sales Order screen
-
Use the search bar to search for a customer by name
-
If there is a matching customer, it will automatically load that customer
-
If there are more than one customers matching, you will be able to choose between them
-
Click on the red X icon to deselect the customer
-
-
Choose the Document Type, Sales Person, Date, and Tax Item, and enter an associate Purchase Order number
-
Delivery, Quote, Work Order and Internet Order Document Types add an “Expires” date field
-
Internet Order also adds an “e-Commerce” section next to the Parts Table
-
-
Add inventory by clicking Add or From Search
-
Add will add a row to the table where you can type in the Tag # of the part to have the rest of the information pull in
-
From Search will take you to the Part Search page
-
Selecting a part will load that part into the Sales Order
-
-
-
Add a payment by clicking on Payments
-
Click Save to save the Sales Order
-
Click the Up Arrow icon next to Save to also print the Invoice and/or Parts List
-
Related articles
- ITrack Chromium Knowledge Base
- Home Page
- Searching for Customers
- Getting Started
- Customer Page
- Customer Information
- How To: Create a New Customer
- Sales Order Page
- How To: Create a New Sales Order
- Sales Order Document Types
- Dashboard Page
- Dashboard Chart Types
- Dashboard Report Configuration
- Dashboard User Permissions
- How To: Create a Dashboard Report
- Interchange Page
- Part Page
- Searching for Parts
- Part Information
- How To: Create a New Part
- Purchase Order Page
- How To: Create a New Purchase Order
- QuickBooks Online
- How To: Set Up the QuickBooks Online Integration
- Vehicle Page
- Searching for Vehicles
- Vehicle Information
- How To: Create a New Vehicle
- Vendor Page
- Searching for Vendors
- Vendor Information
- How To: Create a New Vendor
- Scanner Page
- Configuration Page
- eBay Template Tags