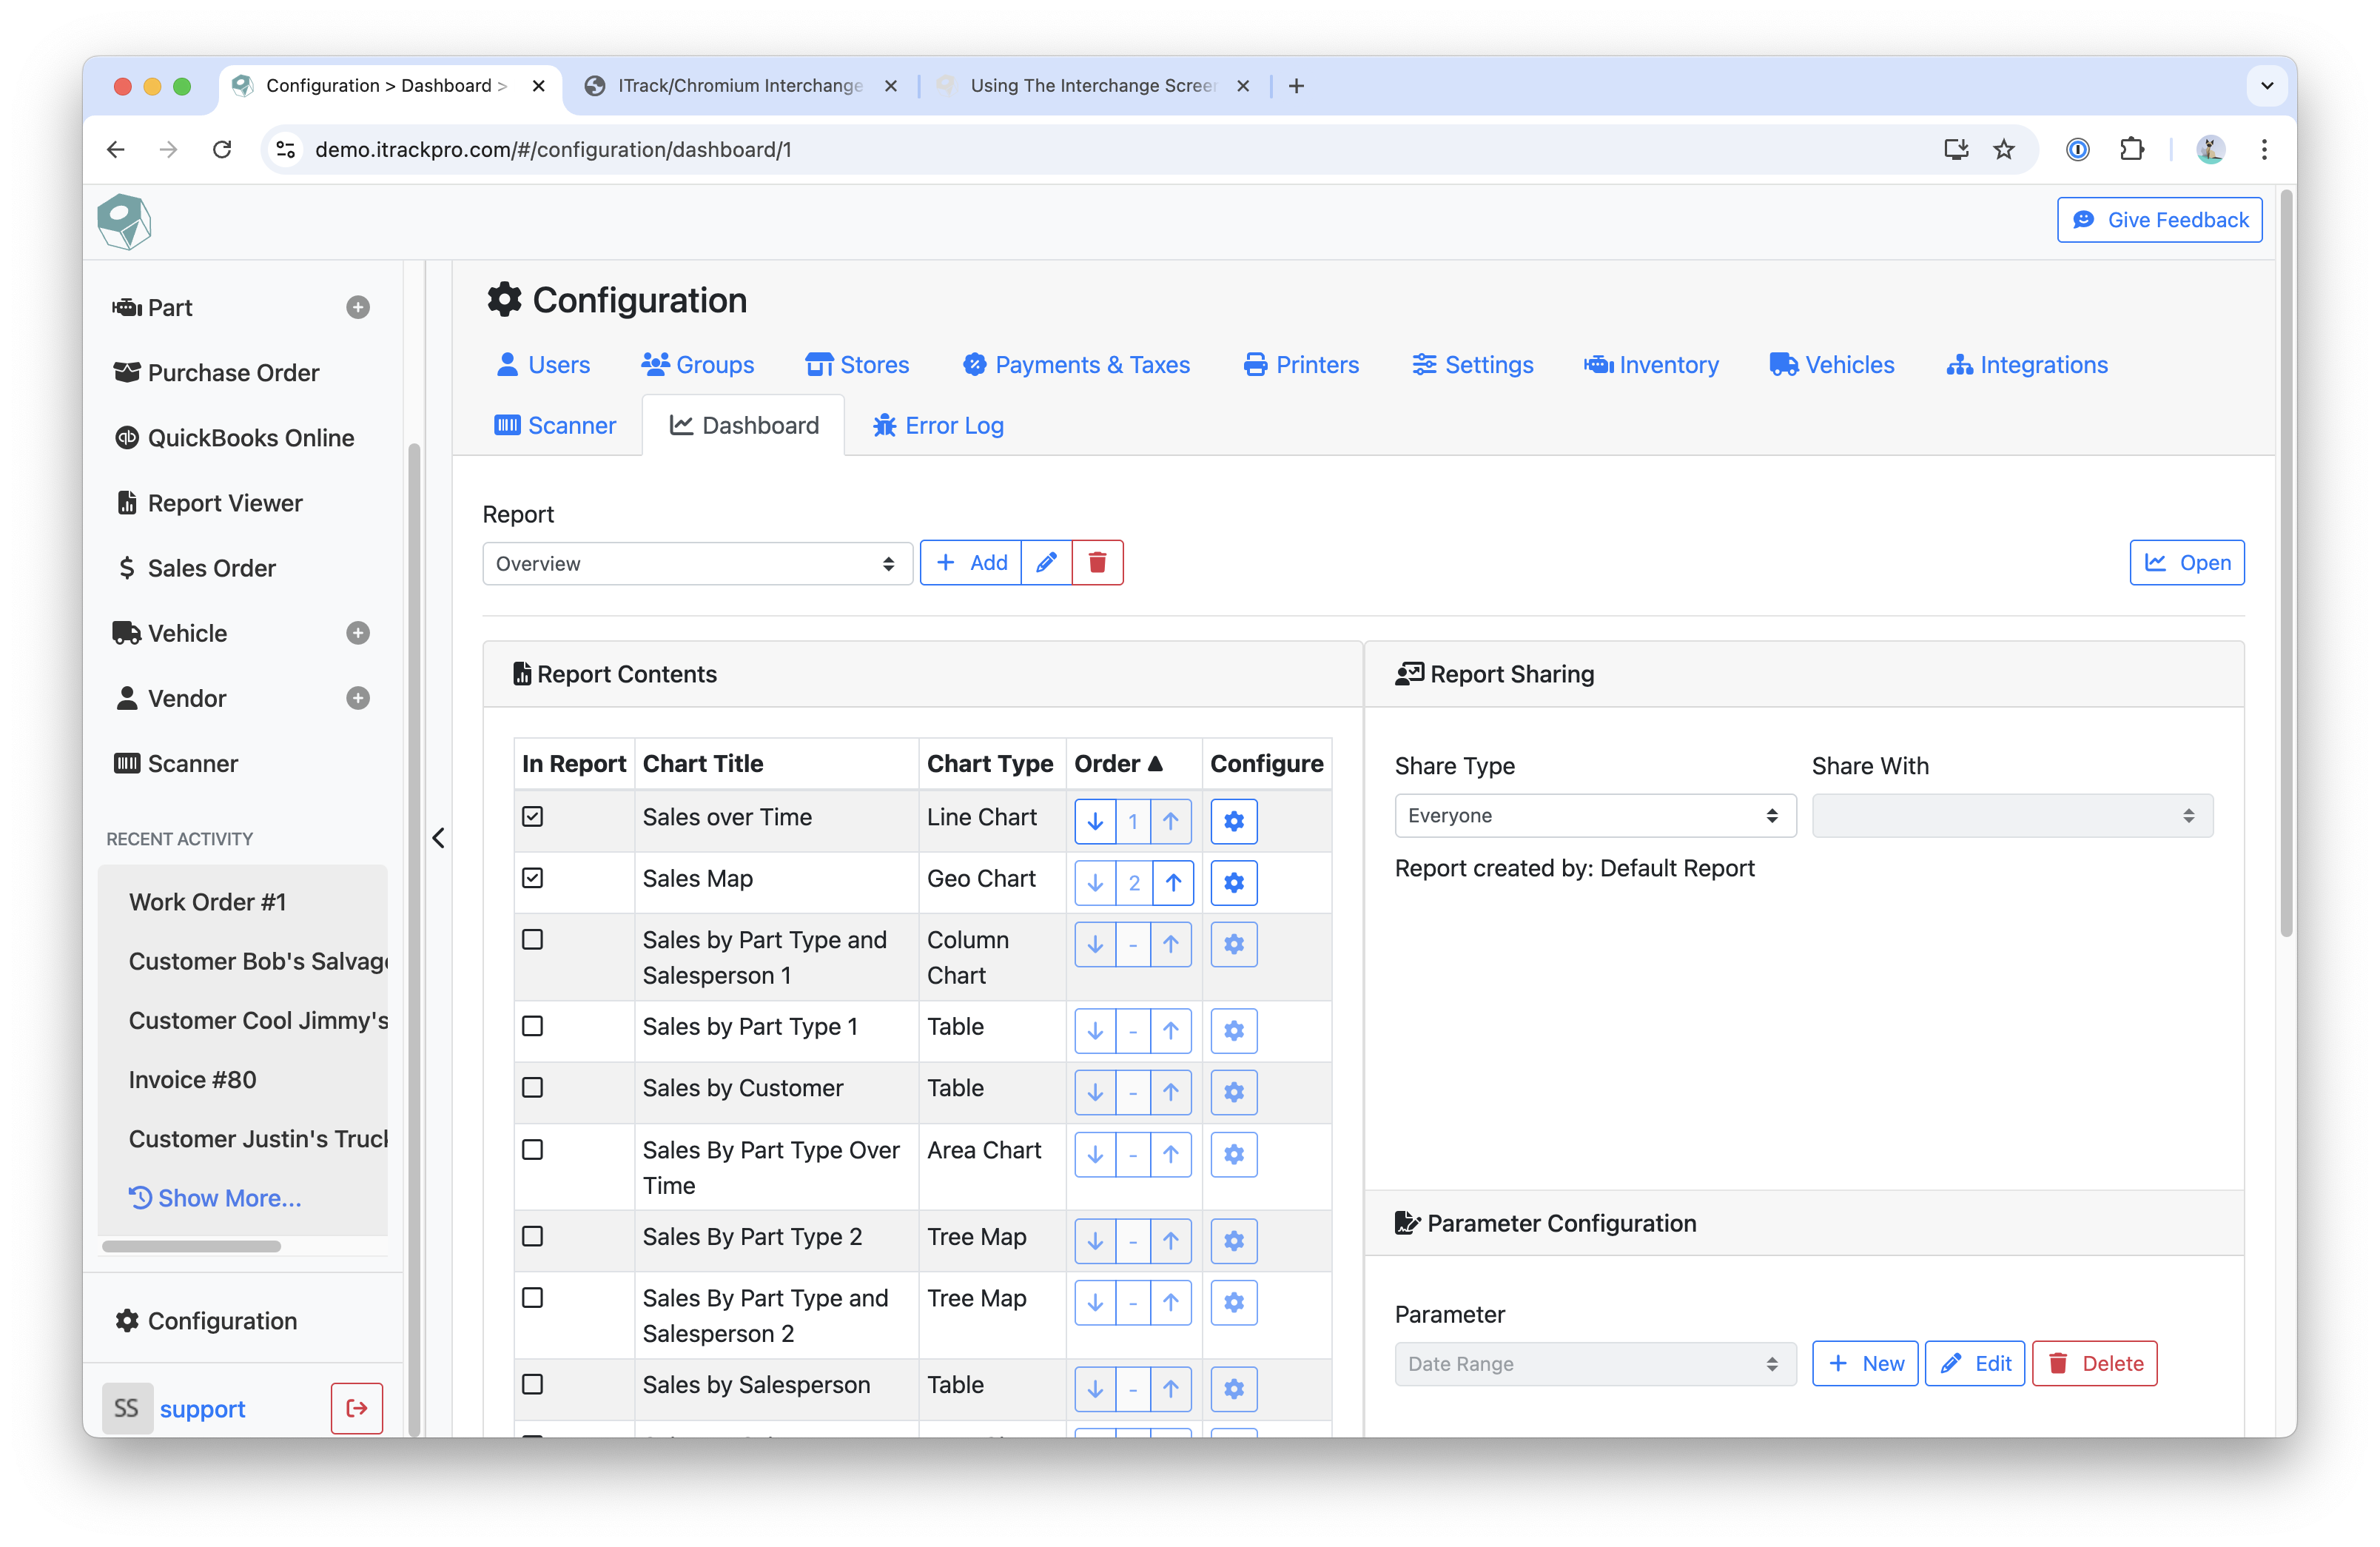
You can manage your Dashboard Reports on the Configuration page.
Instructions
-
There are two ways to navigate to the Configuration > Dashboard page:
-
In the sidebar menu, click Configuration
-
On the Dashboard page, click the Gear icon
-
-
Select a report by using the Report dropdown
-
Click the Pencil icon to edit the name of the report
-
Use the Trash Can icon to delete the report
-
To view the Dashboard Report, click the Open button
Report Contents
In the Reports Content section, you will be able to select which charts to add to the report.
Instructions
-
To add a chart to the report, check the checkbox under the In Report column
-
Use the Arrow icons to change the order of the charts
-
To edit a chart, click the Gear icon
Report Sharing
In the Report Sharing section, you can change who is able to see the report.
Parameter Configuration
Use the Parameter Configuration section to a default date range.
Report Options
Set the Default Auto Refresh Interval in the Report Options section.
Related articles
- ITrack Chromium Knowledge Base
- Home Page
- Searching for Customers
- Getting Started
- Customer Page
- Customer Information
- How To: Create a New Customer
- Sales Order Page
- How To: Create a New Sales Order
- Sales Order Document Types
- Dashboard Page
- Dashboard Chart Types
- Dashboard Report Configuration
- Dashboard User Permissions
- How To: Create a Dashboard Report
- Interchange Page
- Part Page
- Searching for Parts
- Part Information
- How To: Create a New Part
- Purchase Order Page
- How To: Create a New Purchase Order
- QuickBooks Online
- How To: Set Up the QuickBooks Online Integration
- Vehicle Page
- Searching for Vehicles
- Vehicle Information
- How To: Create a New Vehicle
- Vendor Page
- Searching for Vendors
- Vendor Information
- How To: Create a New Vendor
- Scanner Page
- Configuration Page
- eBay Template Tags